
What Makes an Object Easy or Difficult to 3D Scan?
17th Aug 2026
Not every object is equally easy to 3D scan.
Two objects that are roughly the same size can behave completely differently during capture. One may scan cleanly in a few minutes, while the other may require markers, surface preparation, multiple scanning modes, or several separate scan projects.
The difference usually comes down to a combination of geometry, surface material, color, reflectivity, texture, size, movement, and accessibility.
Understanding these factors before scanning can save a lot of time. It also helps determine which scanning mode, tracking method, and preparation steps will give the best result.
Geometry Is One of the Biggest Factors
A 3D scanner needs enough information to understand both the shape of the object and its own position as it moves around it.
Objects with varied geometry are generally easier to scan because they contain recognizable features that help maintain tracking.
Corners, holes, edges, ribs, raised details, curves, and changing surface shapes all provide useful references.
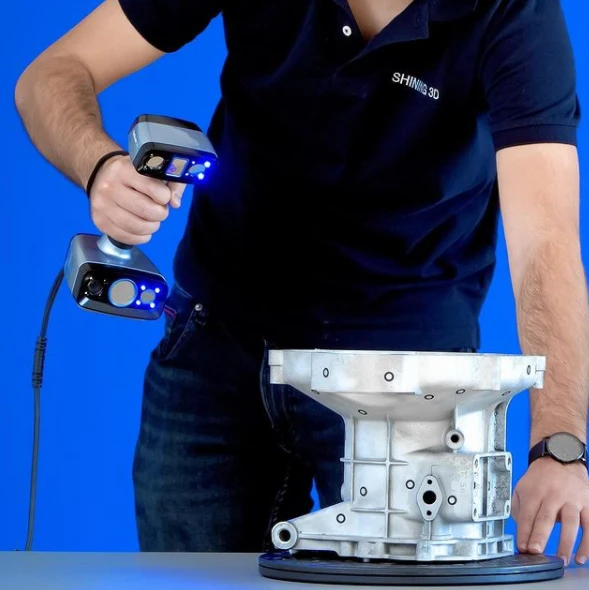
A mechanical housing with several openings, mounting points, and irregular contours may track extremely well because every section looks different from the next.
Smooth or repetitive geometry can be much more difficult.
A large flat panel, plain cylinder, sphere, or symmetrical molded part may provide very little information for the scanner to use. As the scanner moves, one section can look almost identical to another, making it harder for the software to determine its position.
This is one of the most common causes of tracking loss.
Feature-Rich Objects Are Usually Easier
Objects with distinct features tend to be some of the easiest subjects for markerless scanning.
Consider an engine component with bolt holes, ribs, openings, cast texture, and irregular contours. Even if the surface color is fairly uniform, the geometry itself gives the scanner plenty of references.
Compare that with a smooth automotive door panel.
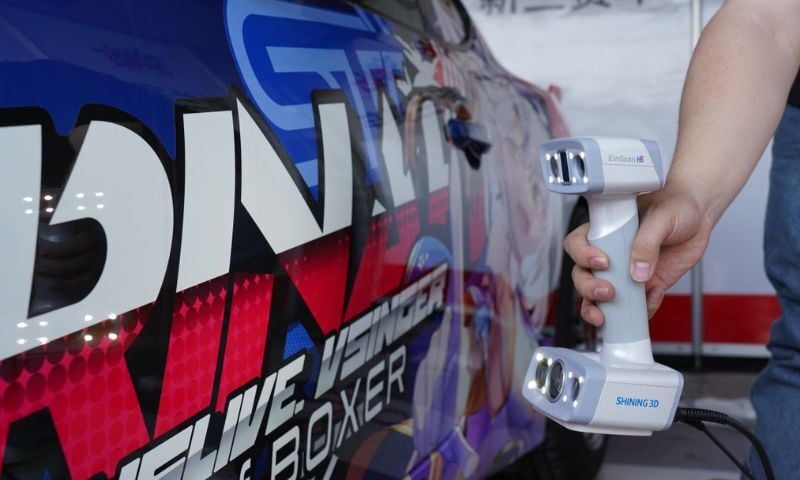
The door may be much larger, but its broad continuous surface contains fewer distinctive features. The scanner has less information available for tracking, so markers or a different scanning method may be needed.
A good rule is that the more visually or geometrically unique each area of the object is, the easier it usually is for the scanner to maintain its position.

Symmetry Can Cause Tracking Problems
Symmetry is a common challenge that is easy to overlook.
If both sides of an object look nearly identical, the scanner may have difficulty determining which side it is currently viewing.
Cylindrical parts are a classic example. A smooth pipe may look almost exactly the same as it rotates, providing very little positional information.
Repeated features can create a similar problem. A grille, gear, fence, or series of identical holes may contain plenty of geometry but still be difficult to track because each section resembles the next.
Reflective markers are often useful in these situations because they introduce an artificial pattern that breaks the symmetry.
Instead of relying entirely on the object, the scanner can use the marker arrangement as a unique reference.
Surface Color Matters
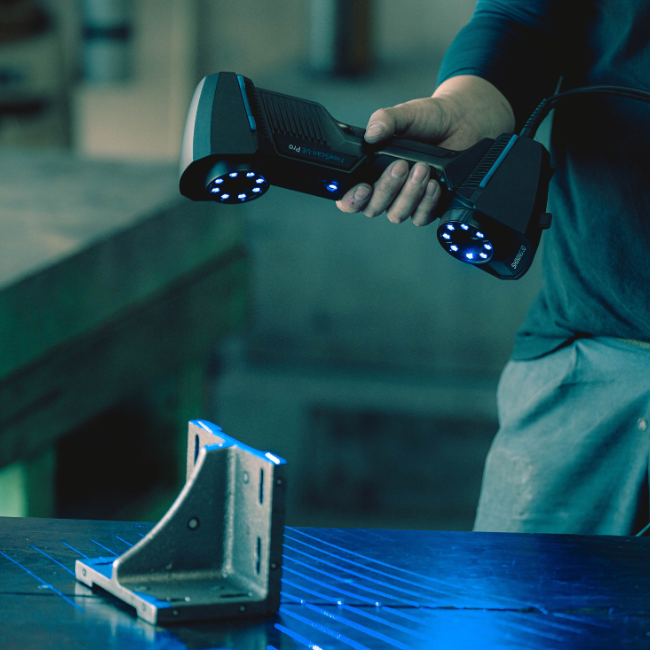
Very dark surfaces can be difficult for some optical scanning technologies because they absorb much of the projected light.
Black rubber, dark plastics, carbon fiber, black fabric, and matte black coatings can all reduce the amount of light returning to the scanner's cameras.
The effect depends heavily on the scanning technology.
Modern blue-laser scanners generally perform much better on dark surfaces than traditional structured-light systems. Infrared scanning can also work well on many materials, although extremely dark or optically challenging surfaces may still require adjustments.
If the scanner is struggling, changing exposure or switching scanning modes may be enough to improve the result.
Surface preparation should usually be considered only after the available scanning settings and technologies have been tried.
Reflective Surfaces Create a Different Problem
Reflective objects do not necessarily absorb the projected light. Instead, they redirect it.
Polished metal, glossy paint, chrome, mirrors, and highly reflective plastics can bounce the scanner's light away from the cameras or create strong glare.
This can produce missing geometry, unstable data, floating points, or noisy surfaces.
The viewing angle becomes particularly important.
A surface that scans poorly from one direction may capture cleanly from another because the reflection is no longer being directed away from the scanner.
Blue laser scanning is generally much better suited to reflective industrial materials than conventional structured light, but extremely polished surfaces may still require dulling spray.

Transparency Is One of the Hardest Challenges
Transparent and translucent objects are among the most difficult subjects for optical 3D scanning.
Glass, clear plastic, transparent resin, and similar materials allow projected light to pass through the surface instead of reflecting it back normally.
The scanner may see the surface behind the object, internal reflections, or inconsistent light patterns rather than the actual outer geometry.
For most transparent objects, surface preparation is the most reliable solution.
A temporary scanning spray creates an opaque matte layer that gives the scanner a visible surface to measure.
Once the scan is complete, the coating can be removed or allowed to disappear if a sublimating spray is used.
Matte Surfaces Are Usually the Easiest
A light-colored matte object is close to an ideal scanning subject.
Matte surfaces diffuse projected light in many directions, allowing the scanner's cameras to see the pattern clearly from different angles.
This is why unfinished clay, plaster, matte plastic, cardboard, and many cast surfaces tend to scan very easily.
The combination of a non-reflective finish and distinct geometry usually requires very little preparation.
If someone is learning a new scanner, starting with a matte, feature-rich object is often much easier than beginning with a black glossy component.
Texture Can Help Tracking
Visible surface texture can also provide useful tracking information.
Printed graphics, labels, scratches, wood grain, fabric patterns, paint variation, and natural color differences help distinguish one area of the object from another.
Some scanning modes can actively use this texture to maintain alignment.
This can be particularly helpful on objects that have limited geometric detail but strong visual variation.
A relatively flat printed panel, for example, may be difficult to track using geometry alone but much easier when texture tracking is available.
The opposite is also true. A completely white object with smooth surfaces may provide very little useful geometry or texture.
Object Size Changes the Workflow
Object size influences nearly every part of the scanning process.
Small objects require enough resolution to capture their fine details. Large objects require a wider field of view, greater working distance, stable tracking across long scan paths, and manageable data density.
A scanner optimized for full vehicles may not be ideal for a tiny mechanical component, while a high-detail small-part scanner may make capturing an entire vehicle unnecessarily slow.
Very small objects can also become difficult because the scanner may struggle to see enough features at once.
If only a few millimeters of geometry are visible in each frame, maintaining alignment can become challenging.
Turntables, finer scanning modes, or markers may help.
Large Objects Introduce Drift
Large objects create another challenge: accumulated alignment error.
A scan may begin accurately, but small tracking differences can gradually build as the operator moves several meters away from the starting point.
This is often called drift.
Vehicles, molds, industrial structures, machinery, and other large objects may benefit from marker tracking, photogrammetry, optical tracking, or another global reference system.
These technologies help maintain dimensional consistency across the full object rather than relying entirely on local surface alignment.
A large object can therefore be easy to capture visually while still requiring a more advanced workflow to maintain measurement accuracy.
Accessibility Matters as Much as Size
An object does not need to be large to be difficult.
A small component with deep holes, narrow pockets, undercuts, or hidden surfaces can require much more work than a larger open object.
3D scanners are optical devices, so the cameras and projected light need a clear line of sight to the surface.
If the scanner cannot see into a feature, it cannot capture it.
Deep holes are particularly challenging because both the projected pattern and the cameras must reach the same surface at the same time.
Changing the scanner angle can help, but eventually the geometry may become too restricted for a wide scanning pattern.
This is where single-line or narrow laser modes can become extremely useful.
Deep Features Require Different Angles
When scanning recessed geometry, moving closer is not always the solution.
The real problem is often the angle between the scanner, projected light, and cameras.
Tilting or rotating the scanner may reveal a surface that was previously hidden.
For a deep circular hole, it may be necessary to scan around the opening from several directions rather than trying to capture everything from directly above.
The same principle applies to engine bays, interior assemblies, molds, castings, and mechanical housings.
Good scanning technique is often more important than simply increasing resolution.
Moving Objects Are Difficult Objects
A 3D scanner assumes that the object remains in the same position while data is being captured.
If the subject moves, the geometry from one frame no longer matches the geometry from the previous frame.
This can cause misalignment, duplicated surfaces, distorted geometry, or tracking loss.
Rigid mechanical components are therefore much easier than flexible or moving subjects.
People, animals, fabric, foam, cables, and soft materials can all shift during scanning.
Human scanning is possible because modern infrared modes can capture data very quickly, but the subject still needs to remain reasonably still.
Even breathing, facial movement, or changes in posture can introduce small differences.
Flexible Materials Limit Practical Accuracy
Flexible materials create an important distinction between scanner accuracy and project accuracy.
A scanner may be capable of measuring to a few hundredths of a millimeter, but that capability does not matter if the object moves by several millimeters while being scanned.
Rubber, fabric, foam, thin sheet material, and soft upholstery may deform under their own weight or from minor contact.
For these materials, fast capture and stable positioning may be more important than choosing the scanner with the smallest accuracy specification.
Supporting the object properly can also improve the result.
The Scanning Environment Matters
The object itself is only part of the equation.
Lighting, available space, background movement, temperature, and surrounding surfaces can all affect the scanning process.
A scanner may work perfectly on a part in a controlled room but struggle with the same component outdoors in direct sunlight.
Bright sunlight can interfere with infrared scanning in particular because sunlight contains a large amount of infrared energy.
Moving the object into shade or switching to laser scanning may improve performance considerably.
Artificial lighting is usually easier to control, but strong reflections from overhead fixtures can still create problems on polished surfaces.
Give Yourself Room to Move
Scanning a large object in a cramped environment can be surprisingly difficult.
Even if the scanner has no trouble reading the surface, the operator may not be able to maintain the correct working distance or reach the necessary viewing angles.
This is common when scanning vehicle interiors, machinery, installed components, or objects positioned close to walls.
Before starting, consider how you will physically move around the subject.
Sometimes rotating or repositioning the object is easier than trying to force the scanner into a restricted space.
If the part has to move during scanning, it may be better to create a separate project and align the scans afterward.
Markers Can Turn a Difficult Object into an Easy One
Reflective markers are one of the most useful tools for difficult scanning projects.
They provide artificial tracking references when the object itself does not contain enough unique geometry or texture.
Large flat panels, smooth cylinders, symmetrical components, and repetitive structures can become much easier to scan once a good marker pattern is added.
Marker placement matters.
Markers should be distributed randomly rather than arranged in straight lines or repeating patterns. The scanner should be able to see several markers from any scanning position.
For larger projects, maintaining overlap between marker groups helps the scanner transition smoothly across the object.
Markers add preparation time, but they can save much more time by reducing tracking loss and alignment problems.
Scanning Spray Can Solve Surface Problems
Scanning spray is another powerful preparation tool, but it solves a different problem.
Markers improve tracking. Scanning spray improves the optical visibility of the surface itself.
A thin matte coating can make transparent, glossy, polished, or extremely dark surfaces much easier for the scanner to capture.
Spray should not automatically be the first solution.
Modern laser scanners can handle many difficult materials without it, and applying spray adds preparation and cleanup.
For inspection or precision reverse engineering, the thickness of the coating should also be considered.
But when the surface is fundamentally incompatible with optical scanning, a light and consistent coating can transform an extremely difficult object into a straightforward one.
Choosing the Right Scanning Mode Makes a Major Difference
The same object can feel easy or difficult depending on the scanning mode being used.
A high-speed laser mode may be ideal for the broad surface of a casting but struggle with a deep slot.
A fine laser mode may capture the slot beautifully but take too long to cover the entire component.
Infrared scanning may capture a large person or piece of furniture quickly but may not provide the accuracy required for a tight-tolerance inspection.
This is why difficult objects should not always be approached with one mode from beginning to end.
A better workflow may use fast scanning for the overall shape and switch to a more specialized mode for difficult areas.
Sometimes Multiple Scans Are Better
There is also no requirement that every object be captured in one continuous scan.
If the underside cannot be reached, the part may need to be flipped.
If one area requires different settings, it may make sense to capture it separately.
If a large project becomes difficult to manage, dividing it into several sections can improve both scanning and processing.
These projects can later be aligned using shared geometry or markers.
Trying to force every surface into one continuous session can sometimes make a project harder than it needs to be.
Examples of Easy Objects to Scan
A relatively easy scanning subject might include a medium-sized matte mechanical component with several holes, edges, ribs, and irregular surfaces.
It provides useful geometry for tracking, reflects projected light predictably, remains rigid during capture, and can be reached from multiple angles.
Castings, sculptures, textured plastic components, many tools, and detailed consumer products often fall into this category.
These objects may require little more than choosing the appropriate scanning mode and maintaining a consistent working distance.
Examples of Difficult Objects to Scan
At the other end of the spectrum, imagine a large glossy black cylindrical tank.
It combines several difficult characteristics at once.
The black finish absorbs light. The glossy coating creates reflections. The cylindrical shape provides very little unique geometry. The large size increases the risk of drift, and the repeated surface may provide few natural tracking references.
That object might require blue laser scanning, reflective markers, careful exposure, and possibly surface preparation.
A clear acrylic panel creates a different problem. It may be geometrically simple and easy to access, but the transparent surface itself prevents reliable optical capture.
A soft black car seat combines dark material, limited geometry, and movement.
Each difficult object requires a different solution because the underlying problem is different.
A Practical Pre-Scan Checklist
Before starting a project, spend a few moments evaluating the object.
Look at its geometry. Does it have enough unique edges, holes, curves, or other features for tracking?
Check the surface. Is it matte, dark, reflective, transparent, or a combination of several materials?
Consider the size. Can the scanner capture enough of the object in each frame, and will volumetric accuracy matter across the full distance?
Look for hidden geometry. Are there deep holes, undersides, narrow gaps, or areas that will require a different scanning angle?
Determine whether the object can move. Flexible or unstable parts may need support.
Finally, decide whether markers, scanning spray, a turntable, or multiple scan projects will make the process easier.
A few minutes of planning can prevent a lot of unnecessary rescanning.
Final Thoughts
The easiest objects to 3D scan are usually rigid, matte, feature-rich, accessible, and appropriately sized for the scanner.
Difficult objects often combine the opposite characteristics: smooth geometry, symmetry, dark or reflective materials, transparency, movement, hidden features, or very large dimensions.
The important thing is that “difficult to scan” does not necessarily mean “cannot be scanned.”
Most challenges can be addressed by identifying the actual problem and choosing the appropriate solution.
Tracking problems may call for markers or a different tracking method. Surface problems may require laser scanning, exposure adjustments, or scanning spray. Hidden geometry may require different angles or specialized laser modes. Large objects may benefit from photogrammetry or optical tracking.
Understanding why an object is difficult makes it much easier to choose the right workflow.
And that leads naturally into the next question: which scanning mode should you use for the job?